“We’ll Leave The Light On For You”

>> Monday, January 31, 2011

I suspect we have all heard Tom Bodett, the spokesperson for Motel 6, repeat that phrase numerous times in the past 20+ years.  I wasn’t aware that my goats had ever heard that slogan but it seems they have taken it to heart.  Numerous time over the past several months I have gone to the barn to do my chores to find that the goats have “left the light on for me.” 

When I wired the barn I only put in 4 light fixtures.  One light is right over the milking stand and I have it wired to a switch right inside the main entrance door.  The other 3 lights are operated by pull-chain.  One is in front of the hay feeder, one in the hay loft and the 3rd, which gets used infrequently, is in the main area that the goats have access to.  It is this 3rd light that I find turned on for me.
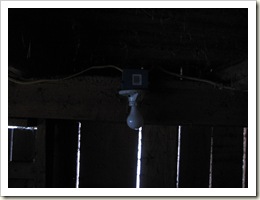
IMG_2658
I know this picture is dark but you can see the light fixture and the bulb.  It is secured near the ceiling, which is quite low being only about 6 feet or so.  Below is how it looks when the goats have thoughtfully turned it on for me.
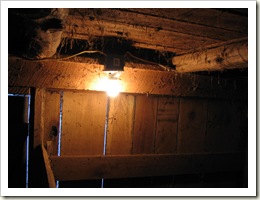
IMG_2659


It is hard to see but the pull-chain is only about 3 inches long and is to the immediate left of the bulb.  As far as I can figure the goats, or most likely THE goat, doing this gets the chain in her mouth and pulls it.  I have yet to catch one in the act but I have it pretty well narrowed down as to the guilty party.  Due to one goat being rough on the other I have been separating them at night.  The temporary pen is right under this light.  So, when I went out a few mornings ago and discovered that the light had been turned on once more I knew that the one in the pen had to be the guilty one.  And that was Zoe!

goats 002 A

Read more...

Making Slingshots

>> Monday, January 24, 2011

I recently watched a YouTube video that I felt the grandsons would enjoy so I sent the link to Darryl. (I’ll put the video in, for your enjoyment as well, at the bottom of this post.)  It is about the use of the old fashioned slingshot.  I know I had several as I was growing up.  My dad made my first one but I made other ones myself.  I could never hit much of anything with them but they were fun.

Shortly after watching the video the 9 year old grandson came down looking for material to make a slingshot.  He wasn’t sure what to use for the “rubber” in the slingshot.  He remembered some of the rags I was using in the shop and he came asking if he could have the elastic from some of my old underwear.  I told him I didn’t believe that would work.  I suggested that if he had an old inner tube he could cut strips from that.  It so happened he had an old bicycle inner tube.  Shortly he had cut out a chunk with his knife and tried fastening it onto his forked stick with screws.  I told him we would just have to make some slingshots.

So, yesterday we made each of the grandsons and the youngest granddaughter a simple little slingshot.  Not professional quality but something to have fun with.

Here is the video I mentioned.


Read more...

Rollin’, Rollin’, Rollin’

>> Saturday, January 22, 2011

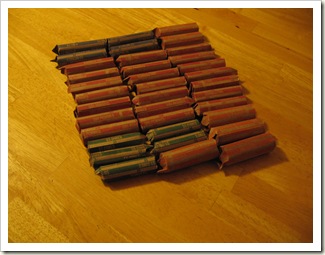
It seems that change accumulates.  Before moving here I would take my accumulation of change to my bank and they would run it through their coin sorting/counting machine and give me currency for it.  I had never checked with my bank here.  We used to save our change to take with us when we travelled as there were a number of toll roads here in Kentucky.  But, a few years ago they took out all of the toll booths and we don’t need coins for the toll roads.  So, the change keeps accumulating.

Last week while we were in town I went into the bank and asked if they had a coin sorting/counting machine.  The answer was “No.”  They were more than happy to supply me with a handful of coin wrappers so that I could sort, count and roll my coins.  It was a morning’s activity to get the coins sorted, counted into stacks and rolled.  After rollin’, rollin’, rollin’ coins I have a bit over $100.00 in coin to take to the bank.  And, now I can start accumulating again.

IMG_2649

Read more...

How Much Does It Cost To Build A Workshop?

>> Thursday, January 13, 2011


I “Googled” this question, phrased as “how much does it cost to build a shed?”  That is a hard question to answer as there are a lot of variables.  One site said $18.00 to $22.00 per square foot.  Another said that “according to the Craftsman National Building Cost Estimator program”  the cost would be $22.85 per square foot. Some sites gave hints how to save money, such as doing your own labor, using used or recycled lumber, etc. 

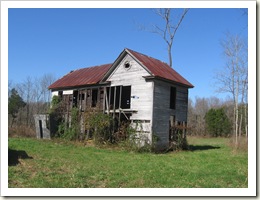
My woodworking shop did not cost me $22.85 per square foot, which would have been over $5000.00.  If you have been reading my blog for the last several months you know that I did my own labor, salvaged material from an old house and obviously cut my expenses to the bone.  I’ve kept pretty close account of my expenditures and so can give you my cost to build my workshop.


Nov. 11 007This is a photo of the old house that I salvaged my building materials from.  There was adequate framing lumber, siding, roofing and wall boards to construct my workshop.

   I had to purchase concrete blocks (although there were a few that had been used under the house to add support to sagging sill logs), concrete mix, fasteners, electrical wiring and some old windows.

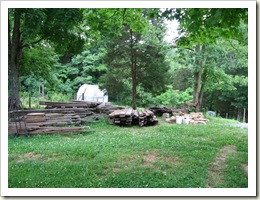
IMG_2254In this picture, to the right, you can see the stacks of used lumber I had hauled home.  Almost all of the lumber used for framing was rough sawn.  Most of the 2x4’s were truly 2” by 4”, the 2x8’s were 2” by 8”.  There was a great deal of work involved pulling all of the old nails out of the boards and getting it hauled home.

The first expense I had was the cost of gasoline for my little truck.  The old house was 25 miles from my home and I had numerous trips up and back.  I tried always to bring a load of material back whenever I went up.  Based on the number of trips, the average cost of fuel and the approximate MPG I got I invested $250.00 in gasoline.

Here is my material cost for what I had to purchase.

Used windows     $40.00


Concrete blocks and concrete mix     $125.00
Fasteners  (nails, screws, staples, etc.)     $115.00
Electrical (breaker box, wire, cable, switches, outlets, etc.)     $290.00
Miscellaneous     $20.00


So, for material cost of $590.00 and gasoline cost of $250.00 (a total of $840.00) I have a 16’ by 14’ workshop with a storage loft above.  Instead of $22.85 a square foot I have cut my cost to $3.75 per square foot.  And, if I count the square footage of the loft as additional my cost drops to $1.88 per square foot. 

My parents were married in 1929 at the beginning of the “Great Depression.”  They learned to live frugally and I grew up learning about recycling before I ever heard the term.  So, recycling an old house into a workshop is just a natural for me.

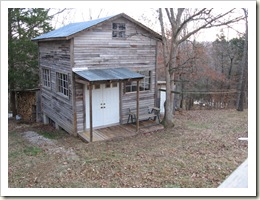
IMG_2621This is the end result.  It has taken me a little over a year since I starting dismantling the old house pictured at the top of this post to get to this point.  It hasn’t been a fulltime job of course and could have been done much more quickly if I had hired a contractor to do the job with all new material, etc. but I just did not have that extra $4500.00 or so to spend.

IF you would care to read the story from start to finish of the project scroll down and find the listing on the left under “labels.”  Near the bottom of the list is the label “woodworking shop.”  Click on this and all 14 or 15 posts will be pulled up, of course the latest one will be first.

Read more...

Update On Woodworking Shop

>> Thursday, January 6, 2011

Since I last updated you on my progress I have been able to spend several hours working on the shop.  I finished the flashing on the porch roof and patched the nail holes in the used metal roofing.

Most of the work has been on the inside of the shop area.  When I tore down the old house I initially was thinking of the framing lumber and the metal roofing.  However, I noticed that the walls and the ceilings had been made with tongue and groove lumber.  Quite a bit had already been removed but it looked to me like there would be plenty for my needs.

Nov. 11 013

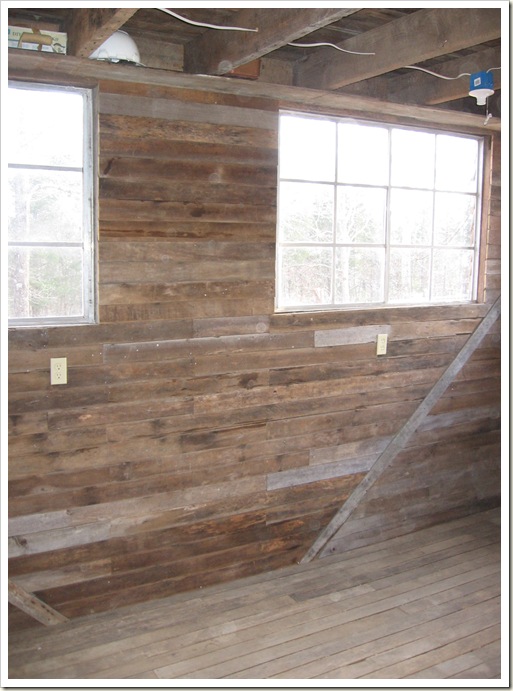
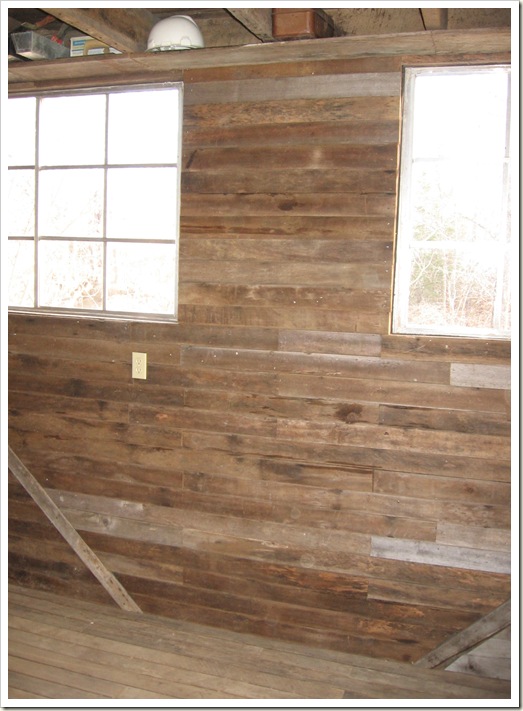
The picture above was taken inside the old house before we brought it down.  What you are seeing is a couple of walls and a partial ceiling.  These are the boards I used on the walls in the workshop.  Below is a couple of photos taken this afternoon in the shop.

IMG_2645


IMG_2646


The diagonal boards are structural braces.  Because of them I had to cut all of the wall boards with angles.  It took a bit longer perhaps but I got the job done.  Now the fun begins to get benches and tools set up.

Read more...

  © Blogger template Sunset by Ourblogtemplates.com 2008

Back to TOP